Connecting to the scanner
Setting the image source
Connecting to the scanner reserves the scanner for your use, and prevents others from using it at the same time.
To connect to a scanner, choose Tools > Image > Scan Images.
Setting the drawing names
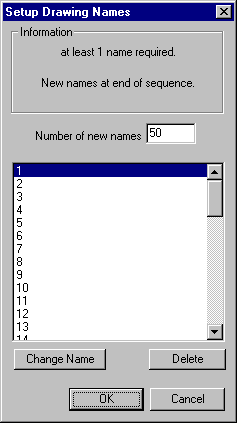
You'll next be asked to set up a drawing name for each drawing, using the Setup Drawing Names dialog box:

There's a description of the numbering system used to manage and control drawings in The numbering system.
- Click on the Change Name drop-down menu. If you are following the example of the line artwork of the girl, choose Name on 2's, since the drawings are timed (and hence numbered) on 2's. The drawing names in the scrollable list change to 1, 3, 5, and so on.
- In the example, these are combined with the level name 'A' that you set up earlier (see Naming the level). This will give you the same names as those on the drawings: 'A1', 'A3', 'A5', and so on.
- You can also select User Naming if you wish to create your own naming system. For more information, refer to Changing drawing names.
- Next, set the Number of new frames. In our example, we use 8, which is the number of drawings we are going to scan into the level.